The first thing I noticed wasn’t the dishes or the crumbs on the counter. It was the grout. That tired, greyish grid between the tiles that used to be white. I was waiting for the kettle to boil, staring at those sad little lines, and suddenly the whole kitchen felt… older. Not dirty, exactly. Just dull, like the room had given up trying.
So I did what most of us do: I opened my phone and typed “how to clean grout fast” and fell straight into a rabbit hole of toxic products, weird tools, and miracles that looked anything but real.
Then a neighbor dropped a sentence that changed everything: “Three ingredients, 15 minutes, and your grout looks new again.”

I honestly didn’t believe her.

Why dirty grout makes a whole room feel tired
Once you start noticing grout, you can’t unsee it. Those thin lines frame every tile, every step, every shower. When they’re dark and stained, the whole space instantly feels older, even if the tiles themselves are beautiful. Your eye catches the contrast first, not the design.
We’ve all been there, that moment when you wipe the floor, step back, and still feel like nothing looks truly clean. The culprit, most of the time, is the grout. It absorbs moisture, soap scum, dust, and whatever your shoes dragged in last week. Over the years, it slowly darkens, almost like a silent timeline of daily life. One day you wake up and realize: this isn’t “slightly used”, this is tired.
A friend of mine had this in her rental bathroom. Fresh coat of paint, nice mirror, decent tiles. Yet the room felt like a cheap motel. The grout between the beige tiles was nearly black in the corners. She thought she needed to re-tile the whole space, already calculating thousands in her head.
One Saturday, while waiting for a plumber, she tried the simple three-ingredient mix she’d seen online. No gloves, no special tools, just things from her pantry. Fifteen minutes later, she sent me a photo. Same tiles, same light. But the grout? It looked almost painted on, clean and sharp. The bathroom suddenly felt like it belonged to a different flat. That’s the strange power of those tiny lines.
Grout is porous, like a sponge frozen between tiles. Every bit of moisture, every drop of soap, every splash of sauce finds its way into those little gaps. Over time, organic residues and minerals settle in, giving bacteria and mold the perfect playground.
This is why regular mopping barely touches the problem. The dirt isn’t on the surface, it’s slightly inside. You pass the mop, the tile shines, your brain says “clean”, but your eyes still catch that grey outline everywhere. *That visual contradiction is what makes us feel our home is never quite fresh enough.* The secret is not scrubbing harder, but using the right combination of ingredients that can penetrate, dissolve, and lift that embedded grime without destroying the grout itself.
The three-ingredient mix that wakes your grout up
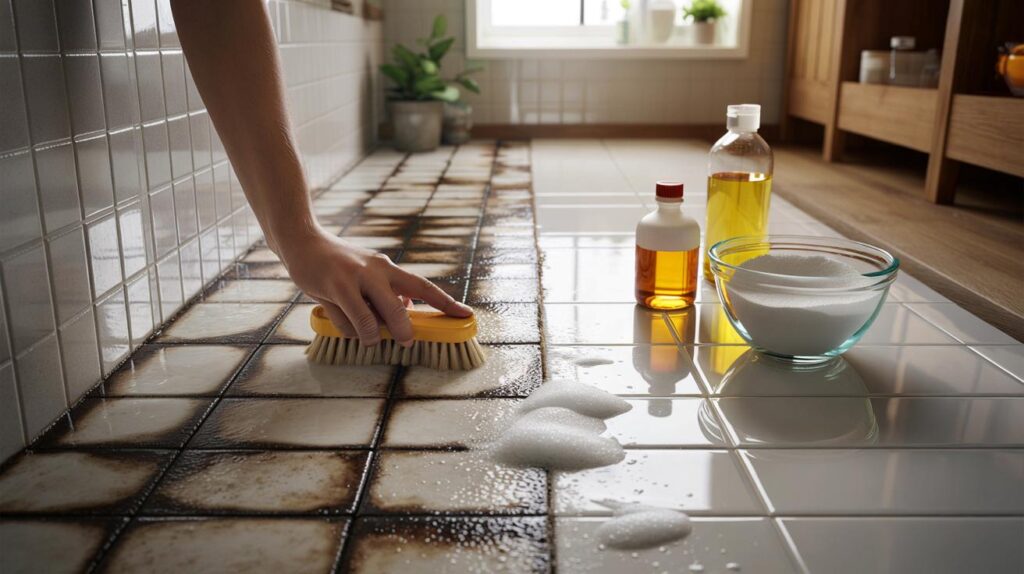
The basic recipe is surprisingly simple: baking soda, white vinegar, and a mild dish soap. That’s all. No bleach, no mystery powders, no ten-step ritual. Start by sprinkling baking soda directly along the grout lines. It should form a thin, visible trail, not a mountain.
Next, mix equal parts white vinegar and warm water in a spray bottle, add a small squirt of dish soap, and gently shake. Spray this blend over the baking soda. It will fizz on contact, like a tiny science experiment running across your tiles. Let that reaction work for about 10–15 minutes, then scrub lightly with an old toothbrush or small brush. Wipe with a damp cloth, rinse once, and step back. The change is often immediate.
One reader told me she tried this on the floor of her entryway, the classic zone of defeat for white grout. Muddy shoes, wet umbrellas, the whole seasonal drama. She’d tried steam cleaning, mopping with strong detergents, even those magic eraser sponges that feel like cheating. The stains always came back, a little lighter but never gone.

She followed the three-step method in the evening, right after putting her kids to bed. No fancy gear, just a bowl, a brush, and a towel. When she wiped the last row and the grout dried, she sent me a voice message that was basically one long “oh my God”. The tiles suddenly popped, as if someone had boosted the contrast on a photo. She confessed she kept walking past that entrance all night, turning the light on just to look.
There’s a simple logic behind this small “miracle”. Baking soda acts like a gentle abrasive and a deodorizer. It loosens dirt mechanically without scratching the tile. Vinegar is acidic; it dissolves mineral deposits from hard water and helps break down soap scum and some types of grime. Dish soap cuts through grease and oily residues that cling to the grout like a thin film.
When they work together, you get a mix that can seep slightly into the pores of the grout, detach the dirt, and bring it to the surface so you can wipe it away. No aggressive bleach fumes, no burned fingers, no discolored lines. Let’s be honest: nobody really scrubs grout every single day. That’s why this rapid, low-effort combo feels so satisfying. You use what you already have and suddenly your floor looks like it skipped back a few years.
How to use it without ruining your grout (or your back)
Start small. Pick a discreet corner of your bathroom or kitchen and test the mix there first. Sprinkle a thin line of baking soda, spray the vinegar–water–soap blend, and let it foam gently. Ten to fifteen minutes is usually enough for light to moderate stains. For older, darker grout, you can leave it up to 20 minutes, as long as the surface stays moist.
Use a soft brush or an old toothbrush to scrub in short, light strokes along the line, not across it. You’re trying to lift, not dig. Wipe the dirty foam off with a damp cloth, then go over the area once more with clean water to remove residue. When it dries, you’ll see the true result. If needed, repeat once. Two short rounds tend to work better than one brutal session.
This is where many people get frustrated. They expect the first pass to restore 15 years of neglect in five minutes. If your grout is deeply stained, you might need two or three cycles spread over a week. That’s not a failure, that’s just reality catching up with us.
Be gentle with colored or very old grout. Strong scrubbing or too much vinegar can weaken it over time. Don’t use metal brushes, sharp tools, or highly concentrated acid “for quicker results”. You’ll risk crumbling the grout or fading its color. Think of it like skincare: regular, soft treatments work better than one aggressive peel that leaves marks. And if you feel your back complaining, do one small zone at a time. Floors can wait; your body, less so.
Sometimes the difference between “this place is depressing” and “this feels like home again” is literally a handful of baking soda and 15 quiet minutes on a Saturday.
- Ingredient comboBaking soda, white vinegar, and dish soap work together to dissolve, lift, and degrease embedded dirt.
- Application timeLet the mix sit 10–15 minutes so the fizzing reaction can reach into the porous grout.
- Right toolsUse a soft brush and microfiber cloth to avoid scratching tiles or wearing out the grout.
- FrequencyLight refresh every few weeks in high-traffic areas keeps grout from darkening again.
- AftercareA quick wipe after showers or cooking sessions slows down future staining and mold.
When tiny details quietly change how you feel at home
There’s something oddly emotional about seeing old grout turn light again. You realize how much those invisible details affect your mood. A clean line between tiles makes the whole room feel sharper, brighter, more intentional. It doesn’t fix everything in life, of course, but it gives a small sense of control in a world that often feels chaotic.

This three-ingredient mix isn’t magic, it’s just accessible chemistry plus a bit of patience. Yet the effect goes beyond hygiene. People tell me they take more pleasure cooking in a kitchen where the floor looks fresh. They linger longer in the bathroom, they feel less embarrassed when guests arrive. Maybe that’s the quiet value here: not the recipe itself, but the feeling that your home is allowed to look loved without spending a fortune or a whole weekend on your knees. You try one small corner, you see the change, and suddenly other neglected corners start whispering: “Your turn next?”
 A Pool Noodle Will Change Your Life in Your Kitchen: Here’s Why It Will Make Everything Revolut
| Key point | Detail | Value for the reader |
|---|---|---|
| Simple recipe | Baking soda, white vinegar, and dish soap from the pantry | Easy to try immediately, no special products needed |
| Short contact time | Let the mix sit 10–15 minutes before scrubbing | Visible results fast, without hours of effort |
| Gentle method | Soft brush, light strokes, no harsh chemicals | Protects grout and tiles while still restoring brightness |
FAQ:
- Question 1Can I use this three-ingredient mix on colored grout?
- Answer 1
- Yes, but test a small hidden spot first. If the color doesn’t fade or change after drying, you can proceed on the rest.
- Question 2Is it safe to mix vinegar and baking soda?
- Answer 2
- Yes, in small household quantities. They react to form carbon dioxide, water, and a mild cleaning solution. Just avoid sealing the mix in a closed container.
- Question 3How often should I clean grout this way?
- Answer 3
- For busy kitchens and bathrooms, once every 4–6 weeks is usually enough after the first deep refresh.
- Question 4What if the grout is still dark after cleaning?
- Answer 4
- Repeat the process a couple of times. Very old or permanently stained grout might need re-grouting or a grout pen to restore its color.
- Question 5Can I use this method in the shower?
- Answer 5
- Yes. Apply on dry grout, let it sit, scrub, then rinse thoroughly. For mold, you may need a dedicated anti-mold product after cleaning.